Package an app using the Desktop App Converter (Desktop Bridge)
In this article
You can use the Desktop App Converter (DAC) to bring your desktop apps to the Universal Windows Platform (UWP). This includes Win32 apps and apps that you've created by using .NET 4.6.1.

While the term "Converter" appears in the name of this tool, it doesn't actually convert your app. Your app remains unchanged. However, this tool generates a Windows app package with a package identity and the ability to call a vast range of WinRT APIs.
You can install that package by using the Add-AppxPackage PowerShell cmdlet on your development machine.
The converter runs the desktop installer in an isolated Windows environment by using a clean base image provided as part of the converter download. It captures any registry and file system I/O made by the desktop installer and packages it as part of the output.
The Desktop Bridge was introduced in Windows 10, version 1607, and it can only be used in projects that target Windows 10 Anniversary Edition (10.0; Build 14393) or a later release in Visual Studio.
Checkout this series of short videos published by the Microsoft Virtual Academy. These videos walk you through some common ways to use the Desktop App Converter.
The DAC does more than just generate a package for you
Here's a few extra things it can do for you.
Windows 10 Creators Update
вњ”пёЏ Automatically register your preview handlers, thumbnail handlers, property handlers, firewall rules, URL flags.
вњ”пёЏ Automatically register file type mappings that enable users to group files by using the Kind column in File Explorer.
вњ”пёЏ Register your public COM servers.
Windows 10 Anniversary Update or later
вњ”пёЏ Automatically sign your package so that you can test your app.
вњ”пёЏ Validate your app against Desktop Bridge and Microsoft Store requirements.
To find a complete list of options, see the Parameters section of this guide.
If you're ready to create your package, let's start.
First, consider how you'll distribute your app
If you plan to publish your app to the Microsoft Store, start by filling out this form. Microsoft will contact you to start the onboarding process. As part of this process, you'll reserve a name in the store, and obtain information that you'll need to package your app.
Make sure that your system can run the converter
Make sure that your system meets the following requirements:
- Windows 10 Anniversary Update (10.0.14393.0 and later) Pro or Enterprise edition.
- 64 bit (x64) processor
- Hardware-assisted virtualization
- Second Level Address Translation (SLAT)
- Windows Software Development Kit (SDK) for Windows 10.
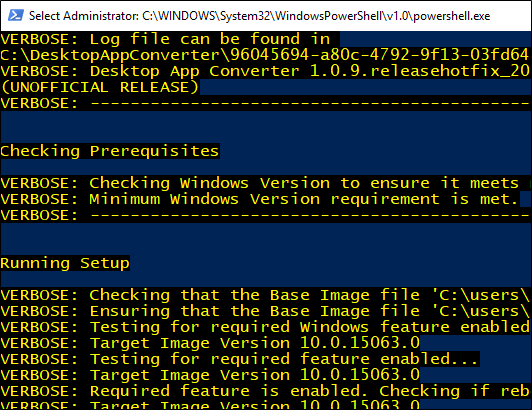
Start the Desktop App Converter
Run the Desktop App Converter as an administrator.

A console window appears. You'll use that console window to run commands.
Set a few things up (apps with installers only)
You can skip ahead to the next section if your app doesn't have an installer.
Identify the version number of your operating system.
To do that, type winver in the Run dialog box, and then choose the OK button.

You'll find the version of your Windows build in the About Windows dialog box.

Make sure that the version number that appears in the name of the file matches the version number of your Windows build.
If you're using build number 15063, and the minor version of that build is equal to or greater than .483 (For example: 15063.540), make sure to download the BaseImage-15063-UPDATE.wim file. If the minor version of that build is less than .483, download the BaseImage-15063.wim file. If you've already setup an incompatible version of this base file, you can fix it. This blog post explains how to do that.
Place the downloaded file anywhere on your computer where you'll be able to find it later.
In the console window that appeared when you started the Desktop App Converter, run this command: Set-ExecutionPolicy bypass .
Restart your computer if you're prompted to do so.
Status messages appear in the console window as the converter expands the base image. If you don't see any status messages, press any key. This can cause the contents of the console window to refresh.
When the base image is fully expanded, move to the next section.
Package an app
To Package your app, run the DesktopAppConverter.exe command in the console window that opened when you started the Desktop App Converter.
You'll specify the package name, publisher and version number of the app by using parameters.
If you've reserved your app name in the Windows store, you can obtain the package and publisher names by using the Windows Dev Center dashboard. If you plan to sideload your app onto other systems, you can provide your own names for these as long as the publisher name that you choose matches the name on the certificate you use to sign your app.
A quick look at command parameters
Here are the required parameters.
You can read about each one here.
Here's a few common ways to package your app.
Package an app that has an installer (.msi) file
Point to the installer file by using the Installer parameter.
There are two important things to keep in mind here. First, make sure that your installer is located in an independent folder and that only files related to that installer are in the same folder. The converter copies all of the contents of that folder to the isolated Windows environment.
Secondly, if the dev center assigns an identity to your package that begins with a number, make sure that you also pass in the -AppId parameter, and use only the string suffix (after the period separator) as the value of that parameter.
If your installer includes installers for dependent libraries or frameworks, you might have to organize things a bit a differently. See Chaining multiple installers with the Desktop Bridge.
Package an app that has a setup executable file
Point to the setup executable by using the Installer parameter.
If the dev center assigns an identity to your package that begins with a number, make sure that you also pass in the -AppId parameter, and use only the string suffix (after the period separator) as the value of that parameter.
The InstallerArguments parameter is an optional parameter. However, because the Desktop App Converter needs your installer to run in unattended mode, you might have to use it if your app needs silent flags to run silently. The /S flag is a very common silent flag, but the flag that you use might be different depending on which installer technology you used to create the setup file.
Package an app that doesn't have an installer
In this example, use the Installer parameter to point to the root folder of your app files.
Use the AppExecutable parameter to point to your apps executable file.
If the dev center assigns an identity to your package that begins with a number, make sure that you also pass in the -AppId parameter, and use only the string suffix (after the period separator) as the value of that parameter.
Package an app, sign the app, and run validation checks on the package
This example is similar to first one except it shows how you can sign your app for local testing, and then validate your app against Desktop Bridge and Microsoft Store requirements.
If the dev center assigns an identity to your package that begins with a number, make sure that you also pass in the -AppId parameter, and use only the string suffix (after the period separator) as the value of that parameter.
The Sign parameter generates a certificate and then signs your app with it. To run your app, you'll have to install that generated certificate. To learn how, see the Run the packaged app section of this guide.
You can validate you app by using the Verify parameter.
A quick look at optional parameters
The Sign and Verify parameters are optional. There are many more optional parameters. Here are some of the more commonly used optional parameters.
You can read about all of them in the next section.
Parameter Reference
Here's the complete list of parameters (organized by category) that you can use when you run the Desktop App Converter.
You can also view the entire list by running the Get-Help command in the app console window.
Run the packaged app
There's two ways to run your app.
One way is to open a PowerShell command prompt, and then type this command: Add-AppxPackage –Register AppxManifest.xml . It's probably the easiest way to run your app because you don't have to sign it.
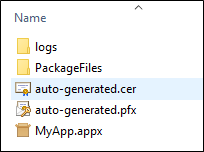
Another way is to sign your app with a certificate. If you use the sign parameter, the Desktop App Converter will generate one for you, and then sign your app with it. That file is named auto-generated.cer, and you can find it in the root folder of your packaged app.
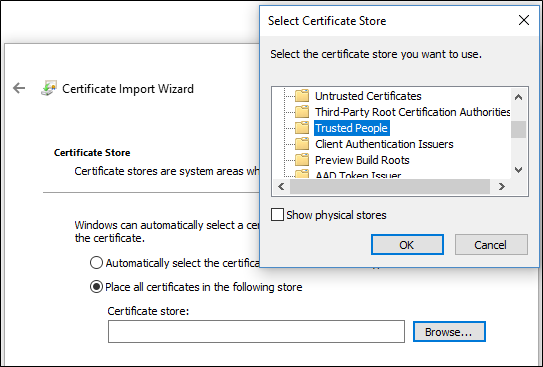
Follow these steps to install the generated certificate, and then run your app.
Double-click the auto-generated.cer file to install the certificate.
If you're prompted for a password, use the default password "123456".
In the Certificate dialog box, choose the Install Certificate button.
In the Certificate Import Wizard, install the certificate onto the Local Machine, and place the certificate into the Trusted People certificate store.
In root folder of your packaged app, double click the Windows app package file.

Install the app, by choosing the Install button.

Modify the packaged app
You'll likely make changes to your packaged app to address bugs, add visual assets, or enhance your app with modern experiences such as live tiles.
After you make your changes, you don't need to run the converter again. In most cases, you can just repackage your app by using the MakeAppx tool and the appxmanifest.xml file the DAC generates for your app. See Generate a Windows app package.
If you modify any of the visual assets of your app, generate a new Package Resource Index file, and then run the MakeAppx tool to generate a new package. See Generate a Package Resource Index (PRI) file.
If you want to add icons or tiles that appear on the Windows taskbar, task view, LT+TAB, snap assist, and the lower right corner of Start tiles, see (Optional Add Target-based unplated assets.
If you make changes to registry settings that your installer makes, you will have to run the Desktop App Converter again to pick up those changes.
The following two sections describe a couple of optional fix-ups to the packaged app that you might consider.
Delete unnecessary files and registry keys
The desktop App Converter takes a very conservative approach to filtering out files and system noise in the container.
If you want, you can review the VFS folder and delete any files that your installer doesn't need. You can also review the contents of Reg.dat and delete any keys that are not installed/needed by the app.
Fix corrupted PE headers
During the conversion process, the DesktopAppConverter automatically runs the PEHeaderCertFixTool to fixup any corrupted PE headers. However, you can also run the PEHeaderCertFixTool on a UWP Windows app package, loose files, or a specific binary. Here's an example.
Telemetry from Desktop App Converter
Desktop App Converter may collect information about you and your use of the software and send this info to Microsoft. You can learn more about Microsoft's data collection and use in the product documentation and in the Microsoft Privacy Statement. You agree to comply with all applicable provisions of the Microsoft Privacy Statement.
By default, telemetry will be enabled for the Desktop App Converter. Add the following registry key to configure telemetry to a desired setting:
- Add or edit the DisableTelemetry value by using a DWORD set to 1.
- To enable telemetry, remove the key or set the value to 0.
Language support
The Desktop App Converter does not support Unicode; thus, no Chinese characters or non-ASCII characters can be used with the tool.
Next steps
Find answers to your questions
Have questions? Ask us on Stack Overflow. Our team monitors these tags.
You can also refer to this list of known issues.
Run your app / find and fix issues


Комментариев нет:
Отправить комментарий